 By Colin Foster
Updated November 2026
A dorm packing list spreadsheet turns a messy pile of “maybe” items into one sortable plan. You will end up with a categorized list, a column showing what to buy versus what you already own, and a quick way to check what fits in your car or bags. This guide walks through setting it up and filling it in.
Start With the Dorm Facts You Already Know
Before you type a single item, gather the details that decide what you need. Check your housing confirmation and the school’s residence hall page for the room type, bed size, whether the room is shared, and whether a shared bathroom or suite applies. Note the climate you are moving into, because a dorm in a cold region needs different bedding and layers than one in a warm one.
Shopping for one? See our guide: Packing List for Europe Summer Male: 4 Best Picks for Men (2026).
Also confirm what the school already provides. Many halls supply a bed frame and mattress, while others expect you to bring a bed-in-a-bag set. Ask your roommate, if you have one, what they are bringing so you do not both buy a microwave or a mini fridge.
Build the Spreadsheet Structure
Create one sheet with these columns: Item, Category, Quantity, Owned (yes/no), To Buy, Packed (checkbox), and Notes. Keep categories consistent so you can filter them later. A practical set of categories is Bedding, Bathroom, Clothing, Electronics, Study, Kitchen, Cleaning and Documents.
Add a second tab for your budget-free shopping list and a third for move-in logistics, such as what goes in the car and what ships ahead. Using a filter on the Category column lets you print only the items for one area of the room when you are shopping or unpacking.
Fill Each Category With Specific Quantities
Vague entries like “towels” cause problems. Write exact counts so you can tell at a glance what is missing. A typical starting list might look like this:
- Bedding: two sets of extra-long twin sheets (most dorm beds are extra-long twin, so check your size), one mattress pad or topper if the mattress is thin, one comforter sized for the bed, two pillows plus protectors.
- Bathroom: three to four bath towels, four washcloths, a shower caddy, flip-flops for communal showers, a bath mat if the hall allows it, and a laundry bag.
- Clothing: enough for about 10 to 14 days before you must do laundry, plus one season of outerwear. Count by outfit, not by item, so you can see gaps.
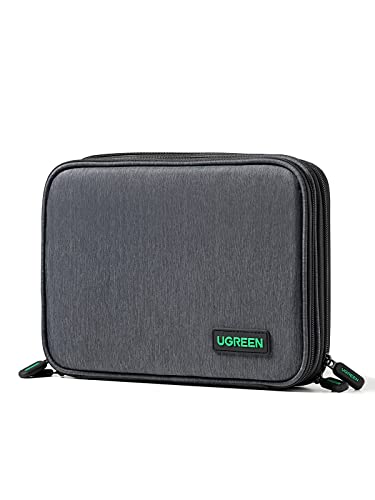
- Electronics: laptop and charger, phone charger, a power strip with a surge protector, and extension cords only if the hall permits them. Check fire-safety rules before buying appliances.
- Study: a laptop stand, notebooks, pens, a planner, and a small desk lamp.
- Documents: ID, insurance card, housing contract, immunization records if required, and a copy of your schedule.
Adjust every count to your own habits. A student who commutes home on weekends needs fewer clothes than someone staying all semester.
Check Rules, Then Confirm With Your Roommate
Use a Notes column to record restrictions. Many residence halls ban halogen lamps, space heaters, candles, string lights with open bulbs, and certain cooking appliances. Read the official housing handbook and check current rules before you buy, since policies vary by school and change from year to year.
Once the list is drafted, share it with your roommate. Mark shared items, such as a fridge, a microwave, a rug, or cleaning supplies, and assign one person to buy each. This prevents duplicate purchases and keeps you from carrying two of everything.
Packing Day Checklist
- Sort the spreadsheet by “Packed” so unchecked items stand out before you leave.
- Pack a separate bag for the first night: sheets, toiletries, chargers, one change of clothes, and medication.
- Label storage bins with the category name, matching the spreadsheet.
- Keep documents in a folder you carry yourself, not in a checked bag.
Common Mistakes
- Forgetting the bed size. Standard dorm beds are often extra-long twin, and regular twin sheets will not fit.
- Buying every item before checking hall rules, which leads to returns or confiscations.
- Overpacking clothes that you could buy later, while underpacking things you need on day one.
- Leaving the spreadsheet untouched after move-in. Update it with what you forgot so next semester’s list starts stronger.
Recommended Gear
A basic clear storage bin set makes sorting easy, and the bins stack under a bed. Search for View on Amazon to compare sizes that fit your frame.
A surge-protected power strip with USB ports covers most electronics. Search for View on Amazon and confirm the model is allowed by your hall.
A shower caddy keeps toiletries off a communal shelf. Search for View on Amazon for a model that hangs over a rod or door.
FAQ
Do I need a separate spreadsheet for each roommate?
Usually one shared sheet works best, with a Owner column showing who is buying each item. Keep personal clothing and documents on a separate tab if you prefer.
How early should I finish the list?
Start about four to six weeks before move-in so you have time to order items that ship slowly. Finalize it a few days before you leave.
Where can I confirm what the dorm allows?
Check the official residence life or housing page for your school, since rules and appliance policies differ. Contact the hall office directly if anything is unclear.
Conclusion
A dorm packing list spreadsheet works because it shows what you own, what you still need, and what is packed. Set up the columns, fill in exact quantities, and check hall rules before you buy. Share the list with your roommate and update it after move-in so the next trip is easier.
Related reading
- Work Travel Packing List: A Step-by-Step Guide for Business Trips
- Women's Packing List for Europe: A Step-by-Step Guide (2026)
- Women's Packing List for 2 Weeks in Europe: A Practical Guide
- Winter Packing List for Europe: What to Bring for Cold-Weather Trips
- Weekend Vacation Packing List: Everything for a Two-Day Trip
- Weekend Trip Packing List: A Step-by-Step Checklist for Two Days Away
Ready to choose one?
About Colin Foster
Colin Foster is part of our editorial team and reviews and edits our travel essentials & packing lists guides, checking product details against manufacturer specifications and owner feedback.